Monday, December 13, 2010

Decorating your Tree without Traditional Ornaments


Depending on your household traditions, your Christmas tree ornaments could be the ones that have been passed down through generations, or ones that you picked up from the corner store! Either way tree ornaments can represent all that you love about Christmas without being traditional. While Christmas ball ornaments are beautiful, how about ideas for ornaments which represent your family, your kid’s, a hobby, or even a past time that you love? Here are ways to decorate your tree without using traditional ornaments.


Festive foods: Believe it or not, food items make great ornaments! From baked cookies to homemade candy ornaments, festive foods that are part of your family’s Christmas traditions are personalized and yummy looking! Visit your local craft store and ask for a spray-on preserver or paint-on liquid lacquer that can be brushed on the food to preserve it. Gingerbread, marshmallows, and ribbon candy can be strung into beautiful ornaments that will add whimsy to your tree.


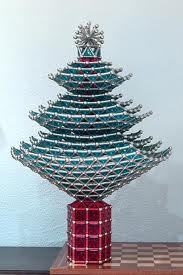
Non-traditional colors: Similarly to our post about decorating your home without the traditional red, ornaments can be hot pink to turquoise! Look around your home and fit your ornament color scheme into your décor. Choose colors from your furniture, walls, or even a piece of art work and draw that theme into hand crafted ornaments or find matching ribbon and tie bows around your Christmas tree branches.

Family memories: Consider using small family pictures, kid’s school arts and crafts projects, or even seashells from your last family vacation to the beach for ornaments. Family mementos make beautiful ornaments and they give your tree a purpose: a place to display all that your family holds dear. Start a family tradition and make an ornament each year that represents the past year. You will be surprised how fun it will be each year to bring out memories when decorating the next year’s tree. 

Everyday household items: Do you have collections of items around your home that you can’t think of what to do with? Safety pins, clothes pins, buttons, and even rocks and pine cones can make beautiful holiday ornaments. Online magazines and home improvement stores always have a wide array of Christmas craft ideas in books, workshops, and do it yourself tutorials online. If you have a personal connection to an item, you may be able to turn it into an ornament! Have a computer geek in the family? Why not give them an ornament made from computer keys!?


Holiday ornaments are a tradition, as is the Christmas tree itself. See if you can be unique this year in your festive decorating, and consider nontraditional ornaments. While the classic ornaments can still be used as background, consider unique ornaments to take center stage on your tree. Try having each family member create an ornament for themselves or for another family member. How exciting your tree will look each year when it is a potpourri of eclectic ornaments and styles.


Sunday, September 26, 2010

Wrap it up...Give your books a new look


1. To determine the height of the jacket, measure the length of your book’s spine and

add 2 inches.

2. To find the width of the jacket, open your book, lay it flat, and measure its span.
Add the width of the covers (not including the spine) to this number.

3. Cut a piece of paintable wallpaper to these dimensions. Lay the paper facedown on a work surface. Fold 1 inch in at each long edge of the paper.

4. Place the book in the center of the paper. It will overlap the folded long edges and hold them in place. Wrap the paper around the book, folding over the book covers. Insert the covers into the pockets created by the folds.

Wednesday, September 8, 2010

DIY::::Framed

It was hard work tracking down that vintage band poster. So why not make a floating frame to protect it from wear and tear? Clear acrylic sheets are available in many sizes, and a hardware store employee can cut them to size for you upon request.


*Center your poster between two clear acrylic sheets that are slightly larger than the size of the poster. Leave the white backing on the bottom piece of acrylic for a matted look.

*Secure the clear acrylic sheets with mirror clips or slide-on glass-door clips. For larger posters, use least two clips per side.

*Determine where you want to hang the poster, and drill small holes into the wall using a cordless drill/driver. Screw cup hooks into the holes.

*Measure the height of your poster frame and add several more inches for hanging as desired. A store employee can cut the chain for you.

*Make two loops by slipping the chain ends over each cup hook.

*Slip the framed poster into the chain loops, and balance its weight between them


Skill level: Beginner

Cost estimate: $30 and up*

Time estimate: Less than 1 day

Materials

2 clear acrylic sheets

mirror clips or slide-on glass door clips

chain

2 cup hooks

Tools

cordless drill/driver

Monday, August 30, 2010

DIY::::Cheerful Cherry Vinyl Floorcloth


Step-by-Step Instructions

1. Unroll the vinyl, and place it face down on a work surface. Use kitchen shears to cut off any ragged edges. Prime the vinyl with two coats of latex primer, and apply two coats of beige paint, allowing each coat to dry.

*****Good To Know: Because you will need a large workspace, consider painting your floorcloth where it will be placed. Lay contractor’s paper under the edges of the vinyl to protect your flooring.


2. Use painter’s tape to mark off a 6-inch-wide border, placing the tape outside of the area to be painted. Paint two coats of dark brown in the border, allowing each coat to dry. Remove the border tape.


3. Download and print the lattice template from the column at right. Use it as a guide to tape off the pattern. Place a small piece of tape in the middle of the areas that will remain painted beige. Paint two coats of light blue in the lattice pattern, allowing each coat to dry. Remove the tape.

4. Download and print the single leaf, leaf and stem, and cherries templates from the column at right. In each diamond shape, place the templates together to create the cherry pattern, and then trace with a pencil. Use hobby brushes to paint two coats for the leaves, cherries, and stems, allowing each coat to dry. 5. Apply four to five coats of polyurethane using a waterproofing brush. Allow each coat to dry.


Materials

1 precut vinyl sheet (6- x 9-foot, #190473)
1 quart of latex primer (Valspar, #164759)
paint (Valspar Signature Colors,  Luxury Linen CI151; Leather Chair CI64; Peaceful CI20; Lily Pond CI241; Cherry Pickin’ CI221; satin)
1 quart of polyurethane (Minwax, #45888)
touch-up and trim roller kit (#144282)
cabinet-and-doors roller kit (#144257)
waterproofing brush (#84405)
5-piece hobby brush set (#105657)
painter’s tape (1-inch, #40998)

Tools You'll Use

kitchen shears
tape measure
pencil

Tuesday, August 10, 2010

Big ideas for small spaces

As we exit the street of "McMansion" and begin down the road of the "big enough" home concept, we need to rethink some of our interior design ideas.Whether your home is a house,condo,or apartment, if you are making do with reduced square footage,you are likely questioning how to make boxy rooms seem bigger and function better.
 After living in all sizes of dwelling, from a 120sq ft boat, to a 1000 sqft house, and just about everything in between, I've learned alot of tricks that can show you how to use colors,furniture placement special installations and other devices to create the illusion of space.
  Have a snmall kitchen or bath, try painting the walls a bright color and keep the cabinets, trim, and ceiling white to refect the light. when it comes to window treatments, the more light you have the bigger your space will seem, choose sheer fabric curtains.
Banning knick-knacks from a small space can make a room seem more spacious, but also cold and lifeless. Try to edit your collection and display them in one or two spots, not scattered all over the room. A group of similar objects, or different objects of the same color, creates a destination for the eye to focus on and avoids a sense of suffocating clutter.

Old interior design wisdom had you believe that big, bold patterns would cramp the style of a small room. However, big bold prints on the walls or a lot of patterns throughout a space can distract you from the size of a area. The secret to making it work is to vary the scale of the patterns. If the walls or draperies have a petite print, for contrast, try a rug with a large-scale print.
And as small furniture may take up less space, and gives an open feel, it usually is not as comfortable as larger pieces, so make do with fewer large pieces in the room. Built-ins are also to be considered. Murphy beds, window seats, bookshelves and shallow cabinets can save space and provide storage while adding design interest.

A few last tips……

*Furniture using clear materials like glass or Lucite give the impression of openness while delivering function.

*Lamps set at different heights brighten small rooms and make the room seem larger.

* Round tables, rugs, pillows, sofas and chairs with curves help a room feel less boxy.

*Floating shelves in place of cabinets add storage but look airy and chic.

Tuesday, July 20, 2010

Sex and the City-Fashionable Interiors


“I’ve been cheating on fashion with furniture,” quips Carrie Bradshaw, played by Sarah Jessica Parker, at the beginning of Sex and the City 2. A sequel to the smash TV show and its successful cinematic spin-off, the movie finds Carrie growing up, learning how to share a new apartment with now-husband Mr. Big (Chris Noth), and extending her passion for all things fashionable to the world of interior design.


“Carrie is trying to make a new apartment for the two of them, not just for her,” says Jeremy Conway, the production designer for the TV series and both films. To that end, Conway, along with set decorator Lydia Marks of Marks & Frantz, created a space that blends masculine elements, such as linear midcentury furnishings and dark woods, with feminine accessories, including whimsical rugs and cheerful botanical-themed fabrics.

But the stylish settings aren’t reserved for the married couple. The movie features a mix of inspiring interiors, from the familiar spaces of Charlotte (Kristin Davis) and Miranda (Cynthia Nixon) to a brand-new Times Square office for Samantha (Kim Cattrall) and even a luxurious, Moroccan-themed hotel.

Sunday, July 18, 2010

All about Bamboo Fabrics


The use of bamboo as a building and fabric material has really taken off in recent years as we have faced the increasing threat of deforestation. Bamboo gets its eco-friendly reputation from its naturally earth friendly properties. It can grow approximately 75 feet in 45 to 60 days, making it the fastest growing plant on earth. Despite its height, bamboo is actually considered a grass, not a tree.


Farming bamboo is not harmful to the environment nor does it require pesticides, fertilizer or chemicals to grow. It is totally degradable and regenerates on its own. Bamboo consumes a lot of nitrogen, which can help with pollution. It is a crucial element in the balance of oxygen and carbon dioxide in the atmosphere. A grove of bamboo releases 35 percent more oxygen than an equivalent grove of trees; therefore, planting bamboo is a great way to reduce our carbon footprint and fight global warming.

Bamboo is softer than most cottons, and it drapes so smoothly and elegantly that it can be used as an alternative to silk. It is also hypoallergenic, and can be anti-microbial when manufactured mechanically.

There are two ways of processing bamboo into fabric: mechanically and chemically. Using the mechanical process, the plant is crushed and natural enzymes are added to break down the woody pulp, which is then converted to a thick liquid called “slurry.” A machine combs out this compound so it can be spun into yarn. It is truly an eco-friendly process, but it’s also labor intensive and costs more, so it is rarely used.

In chemical processing, the bamboo is “cooked” in chemicals. These chemicals turn the bamboo into a solution that is reconstructed into cellulose fiber for weaving into fabric, which is commonly known as bamboo rayon. This process is not eco-friendly, but it is much more common than mechanical processing.

So, where does this leave us? The growth and cultivation of bamboo is very much organic; however, the manufacturing process is definitely not green. The reality is that most of the products we consume, even the eco-friendly ones, have some negative environmental impact. It is important to educate yourself about the best products for you and your family if you’ve made a commitment to being more “green.”

Wednesday, July 14, 2010

DIY:::Gorgeous Grain Artwork


With a little paint and a couple of shelves, unassuming plywood becomes an unexpected work of art.


Step 1: Select a piece of 2’ x 2’ plywood  that has an interesting and pattern with contrasting light and dark wood. Sand the most interesting side using fine-grade sandpaper.

Step 2: Add water to any water-based, white paint (one part water to one part paint) and paint the lighter grain in the wood using the water/paint solution. Apply multiple coats to add more contrast. Let dry.

Step 3: Apply two coats of Minwax Polycrylic . Let dry.

Step 4: Cut a 1” x 3” x 6’ pine  into two pieces to use as shelves (14-inches and 10-inches)
Step 5: From behind the plywood, use 2- 1 1/2-inch screws to attach the 14-inch shelf 4 inches from the bottom and 3 inches from the right edge. Attach the 10-inch shelf 7 1/2 inches from the bottom and extending 2 1/2 inches from the right edge.

Step 6: Attach 2 D-Rings to the back of artwork. Locate them 2 inches down from the top and 2 inches from the side. Hang in desired spot.

Saturday, July 10, 2010

DIY:::Modern Metal

Learn how to transform aluminum sheet metal into sophisticated votive shades, in five simple steps.


1. Determine the desired height and circumference of the shades. Add 1 inch to the width so that the edges will overlap.

2. Using tin snips and wearing protective gloves, cut a sheet of decorative aluminum, found in a hardware store, to the desired dimensions.

3. Using utility scissors, cut strips of metal repair tape  in half lengthwise. (You can find metal repair tape in the paint department.) Cover all edges of the cut sheets with tape.

4. Shape each sheet into a cylinder, overlapping the edges and securing them with a dot of hot glue. Hold or clamp the edges together until the glue sets.

5. Cover the overlapped edges with tape. Place the shade over a votive glass candleholder.

Tuesday, June 29, 2010

DIY::::Bolster

Make this fashionable accessory in just minutes...NO sewing required!!!

1. Roll a length of bubble wrap until you reach your desired bolster diameter.
Secure the roll with masking tape. Use scissors to trim the length for a shorter
 bolster:for a longer bolster,place two rolls side by side.

2. Use a flexible tape measure to check the length and circumference
 of the roll. Add 6 inches to the circumference and 16 inches to the
 length to determine the fabric size needed.

3.Use scissors to cut an 84-inch drapery panel or fabric to fit the roll.

4.Center the roll parallel to the inside cut edge of the panel. Secure
the edge the the roll using self-adhesive squares. Completely wrap the roll. Secure the top edge of the panel with self adhesive squares.


5.Hem unfinished edges by rolling them to the inside
 and securing with a hot glue gun. Tie off each end, candy-wrapper style,
with jute twine or ribbon.