Saturday, June 11, 2011

A few new" Before and After " to ponder


                                                  We can transform your house into your home!

Sunday, May 15, 2011

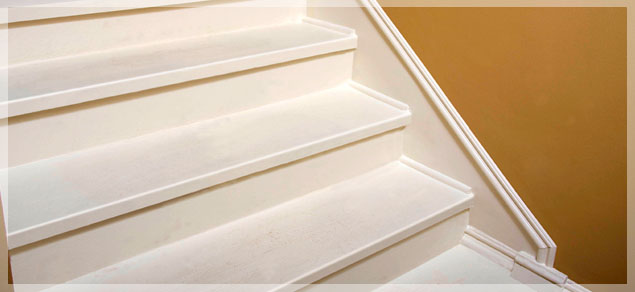
Steppin it Up-Create a Baseboard on a Dime.


Step 1: Clean and prepare the wall to paint

Step 2: Determine the height of the faux baseboard and apply painter’s tape to desired height.

Step 3: Paint faux baseboard desired color (we matched ours to the stairs).


Step 4: Paint shoe molding and chair rail the same color as faux baseboard.

Step 5: Using finishing nails, attach shoe molding to edge of stair tread (where stair meets wall). Using finishing nails, attach chair rail to top of faux baseboard.

Step 6: Touch up nail holes with paint.

Sunday, April 17, 2011

The psychology of color-Enhance you enviroment

The psychology of color


1.) Create the illusion of space with bright colors: If you want your home to look larger than it really is – especially when it is about to go on the market – you can use bright and vibrant colors like yellows and eggshells to add space to your home exterior. As a warning, avoid the common color white. Although it can add space, it is nowhere near as effective as tinted colors.

2.) Appeal to a highly educated crowd with complex colors: For home exteriors and interiors, using colors that consist of more than one word can often appeal to highly educated people. On the other hand, simple colors appeal to lower budgets and lower education levels. When choosing complex colors, think of names like forest green or eggshell white.

3.) Build appetites in your kitchen with red: Red has been shown to increase appetite in most people – one of the reasons that many restaurants choose red patterns in their dining rooms. Using red in your kitchen to increase appetite is as simple as blending beige walls with red shutters or cabinet doors.

4.) Use foyer blends to naturally combine interior and exterior paint: One of the best ways to wow your guests as they enter your home is to use a blend of your interior and exterior colors in your foyer or entryway. You can also use your exterior paint color on parts of your interior to achieve the same general effect.

5.) Warm up your home with deep tones during the winter: Using reds, oranges and yellows in your home paint decor can make the home seem more welcoming from the outside or warmer on the inside – especially during the winter. If you are selling a home during the winter and are planning to paint, keep this in mind.

6.) Cool off in the summer with colder colors: Along the same lines as warm colors in the fall, cool colors, especially blue, can make your home seem fresh, cool and clean during the summer. A white exterior with blue trim is a popular choice for summer homes and painting projects.

7.) Use colors from your past: Many color consultants will say that using familiar colors from your childhood that remind you of fond memories – especially in the kitchen – can bring those memories back and create a pleasant mood. If you can’t remember any colors from your kitchen when you were growing up, just remember that reds and yellows are perfect for playful yet sophisticated kitchens.

8.) Use relaxing colors in relaxing rooms: In your bedroom and bathroom, cool colors can form a relaxing atmosphere with paint. Consider shades of blue, green or even lavender to calm yourself in your escape rooms. When using this technique, remember that the darker the shade of color you choose, the more apparent the effect.

9.) Stay away from red if you have high blood pressure: While it can increase appetite in your kitchen, dark shades of red are often associated with high blood pressure and irritability in other rooms of the house. If you would like a darker color paint for your bedroom or living room, go for a cooler color rather than a warm one.

10.) Flatter yourself with a familiar color in the bathroom: Love to wear a particular color? Consider that color in the bathroom. Think you don’t look very good in a color? Avoid this color for the bathroom at all costs. You want to look good when you check yourself in the bathroom mirror. Having a favorite color in the background really does help.

11.) Combine moods for an aggressive workout room: While it might make sense to use red paint in a workout room, this can actually overdo the sensation of feeling hot. If you want to use a warm color in your workout room, consider a delightful blend of blue and yellow paint on the walls. You can also go for a relaxing green-blue combination for a cooling effect to extend workouts.

12.) Concentrate in your home office with green: Green inspires concentration in a home office setting. And, after all, the faster you get your work done, the more time you will have to spend with your family. In addition to a green plant, try painting the room with a light green. However, don’t turn your home office into a jungle. Over doing it can be distracting. Any painting contractor will tell you green is one of the most popular colors being used right now in home design.

13.) Inspire optimism with yellow: As you might expect, yellow is a perfect color for a sunroom. However, a great way to use yellow inside your home is in an entryway or enclosed front porch. As you leave for the day to go to work or school, the yellow paint in this area will give you one last boost of optimism before the daily grind.

14.) Don’t be fooled by purple: Although purple signifies wealth and romanticism, it is very rare in the natural world and can be very artificial within your home decor. If you really want some purple in your home, try blending it with more natural colors like subtle yellows or greens.

15.) Blend brown for a natural look in your den: If you love the look of wood or leather or already incorporate this earthy natural look in any room of your house, adding some brown paint can amplify the appearance. You should be warned, though, that brown can cause depression in some people.

16.) Black isn’t just for a teenager’s room: Black can be a tough nut to crack if used to paint your walls. The problem with black is that it gives the illusion of tight space. If you would like to satisfy your teenager’s cries for a black room, consider a black ceiling with a few stars. If you want to go all out, you can decorate with a nighttime landscape theme across the room.

17.) Use pink for tranquility in a meditation room: If you are lucky enough to have a separate area in your home just for meditation or relaxation, you might surprised of the effects that some pink can have in your paint scheme. Some sports teams actually paint the away team’s locker room pink as it has been shown to cause a lack of energy.

18.) There’s a reason bathroom fixtures are usually white: White not only symbolizes fertility and cleanliness, but it also makes cleaning easier in the bathroom. You don’t want stains to be hidden so they go without being cleaned. Knowing that the bathroom is clean and fresh with lovely white paint can put your mind at ease and inspire relaxation.

19.) Trust orange for a sick room or asthmatic child’s room: Orange is often associated with improved lung function as well as increased energy. As well as working well in any workout room, a mild orange can be very helpful to those recovering from illness or with lung problems.

20.) When all else fails, look to nature: When using color psychology in your home, choose paints that remind you of nature. Colors that appear in nature will blend perfectly in your home interior. However, with the exterior of your home, bright colors are, more often than not, the best choice for a more welcoming living space.

Wednesday, February 9, 2011

DIY-How to make a High End Feather Wreath

While visiting a beautiful home decor store in Brooklyn, I saw a large, striking feather wall piece. The price tag was far too steep for me, but I knew I could recreate it for myself. Living near LA, I'm lucky to have the garment district and its specialty shops relatively close by, which is where I picked up some colorful feathers. A few days and less than $100 later, I had my very own custom feather art piece.
Even if you don't have a garment district in your town, you can find the materials online pretty easily, and make this distinctive art for your home.

What you’ll need
Feathers of various lengths. You can use up to three different sizes.
One round feather centerpiece mounted on fabric for the center of the canvas (something like this. You could also make your own using a small circle of fabric and the basic instructions below for placing feathers)
Multi-purpose white glue
Round canvas (I used a 20", but you could go bigger or smaller, depending on your space)
A few heavy objects, like large books, to place on top of each layer as it dries
Instructions

1.  If you are using different color feathers, decide what order you want the colors to appear on the canvas. The outermost layer will have the least amount of visibility and the layers closest to the center will be the most visible.


2.  Glue your first layer of feathers along the perimeter of the canvas. Put glue on the entire bottom 1 ½ to 2 inches of each feather to ensure they stick. Each layer will cover about half of the previous layer, so the glued parts won’t show.


3.  Place the heavy objects on top of this layer for about an hour. Remove and let stand for about five more hours.

4.  Repeat the gluing with the next layer, moving it down far enough onto the canvas so that you have as much or as little of the previous layer showing.


5.  Again, place the heavy objects on top of this layer for about an hour. Remove and let stand for about five more hours.

6.  Repeat these steps, gluing layers onto the canvas’s shrinking perimeter till you get to the center of the canvas.

7. Using a generous amount of glue, affix the feather centerpiece in the center, covering the ends of the last layer of feathers.

8.  Place the heavy objects on top for two to three hours. Remove and let stand for a day.

9.  Pick up the piece gently, and make sure all layers are in place and secure, and then hang it on the wall and enjoy your custom made artwork!

Monday, December 13, 2010

Decorating your Tree without Traditional Ornaments


Depending on your household traditions, your Christmas tree ornaments could be the ones that have been passed down through generations, or ones that you picked up from the corner store! Either way tree ornaments can represent all that you love about Christmas without being traditional. While Christmas ball ornaments are beautiful, how about ideas for ornaments which represent your family, your kid’s, a hobby, or even a past time that you love? Here are ways to decorate your tree without using traditional ornaments.


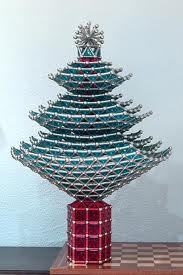
Festive foods: Believe it or not, food items make great ornaments! From baked cookies to homemade candy ornaments, festive foods that are part of your family’s Christmas traditions are personalized and yummy looking! Visit your local craft store and ask for a spray-on preserver or paint-on liquid lacquer that can be brushed on the food to preserve it. Gingerbread, marshmallows, and ribbon candy can be strung into beautiful ornaments that will add whimsy to your tree.


Non-traditional colors: Similarly to our post about decorating your home without the traditional red, ornaments can be hot pink to turquoise! Look around your home and fit your ornament color scheme into your décor. Choose colors from your furniture, walls, or even a piece of art work and draw that theme into hand crafted ornaments or find matching ribbon and tie bows around your Christmas tree branches.

Family memories: Consider using small family pictures, kid’s school arts and crafts projects, or even seashells from your last family vacation to the beach for ornaments. Family mementos make beautiful ornaments and they give your tree a purpose: a place to display all that your family holds dear. Start a family tradition and make an ornament each year that represents the past year. You will be surprised how fun it will be each year to bring out memories when decorating the next year’s tree. 

Everyday household items: Do you have collections of items around your home that you can’t think of what to do with? Safety pins, clothes pins, buttons, and even rocks and pine cones can make beautiful holiday ornaments. Online magazines and home improvement stores always have a wide array of Christmas craft ideas in books, workshops, and do it yourself tutorials online. If you have a personal connection to an item, you may be able to turn it into an ornament! Have a computer geek in the family? Why not give them an ornament made from computer keys!?


Holiday ornaments are a tradition, as is the Christmas tree itself. See if you can be unique this year in your festive decorating, and consider nontraditional ornaments. While the classic ornaments can still be used as background, consider unique ornaments to take center stage on your tree. Try having each family member create an ornament for themselves or for another family member. How exciting your tree will look each year when it is a potpourri of eclectic ornaments and styles.


Sunday, September 26, 2010

Wrap it up...Give your books a new look


1. To determine the height of the jacket, measure the length of your book’s spine and

add 2 inches.

2. To find the width of the jacket, open your book, lay it flat, and measure its span.
Add the width of the covers (not including the spine) to this number.

3. Cut a piece of paintable wallpaper to these dimensions. Lay the paper facedown on a work surface. Fold 1 inch in at each long edge of the paper.

4. Place the book in the center of the paper. It will overlap the folded long edges and hold them in place. Wrap the paper around the book, folding over the book covers. Insert the covers into the pockets created by the folds.

Wednesday, September 8, 2010

DIY::::Framed

It was hard work tracking down that vintage band poster. So why not make a floating frame to protect it from wear and tear? Clear acrylic sheets are available in many sizes, and a hardware store employee can cut them to size for you upon request.


*Center your poster between two clear acrylic sheets that are slightly larger than the size of the poster. Leave the white backing on the bottom piece of acrylic for a matted look.

*Secure the clear acrylic sheets with mirror clips or slide-on glass-door clips. For larger posters, use least two clips per side.

*Determine where you want to hang the poster, and drill small holes into the wall using a cordless drill/driver. Screw cup hooks into the holes.

*Measure the height of your poster frame and add several more inches for hanging as desired. A store employee can cut the chain for you.

*Make two loops by slipping the chain ends over each cup hook.

*Slip the framed poster into the chain loops, and balance its weight between them


Skill level: Beginner

Cost estimate: $30 and up*

Time estimate: Less than 1 day

Materials

2 clear acrylic sheets

mirror clips or slide-on glass door clips

chain

2 cup hooks

Tools

cordless drill/driver